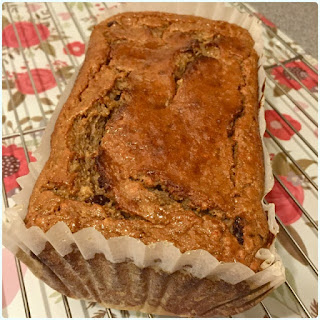
No gluten, no butter, no sugar... no joy...? No. I love my food, I think you all know that. Whilst I'm not on a fat busting crusade, I'm trying to up the amount of good stuff that I eat. I was sick of feeling knackered and felt that I'd lost my bounce so to speak.
I have three periods of the day where I am at risk of reaching for the KitKats; mid morning with a brew, around 3pm when the PLL kicks in (post lunch lull) and about 9pm when I finally sit down. I'm not a huge fan of eggs, and start work early so don't really have time to go faffing with some fancy breakfast, plus the idea of protein shakes sends me west. So, I set about finding something which would fill me up, could be prepared the night before, and did not look like frog spawn.
I found lots of recipes online which incorporated bananas and oats; pancakes, muffins, bars... but they all seemed to lack the element of excitement I was craving, and some reminded me way too much of Trill. So, I made up my own from a few different ones, with a bit more flavour! Not only does this fill you up for hours, but it tastes pretty nice too. I'd highly recommend having this with your morning brew.
Ingredients:
- 2 medium bananas - ripe as hell and mashed up
- 250ml low fat greek yoghurt (more protein than natural)
- 2 medium eggs - beaten
- 4 tbsp honey
- 150g porridge oats, blitzed to a rough powder in a food processor - bits are ok
- 2 tsp gluten free baking powder
- 1/2 tsp bicarbonate of soda
- Pinch of salt
- 2 tsp cinnamon
- 1/2 tsp mixed spice
- 100g fat sultanas

Method:
- Preheat the oven to Gas 4/180 C
- Line a 2lb loaf tin either with a liner or greaseproof paper.
- Mix all the wet ingredients together.
- Mix all the dry ingredients together in a big bowl.
- Add the wet to the dry.
- Tip it into the loaf tin and level out.
- Bake for an hour and fifteen minutes, or until a skewer comes out clean.
- Whilst it's still warm, brush with more honey.
Really, that's as hard as it gets! It'll last for a few days if you keep it in an airtight container too, so you're good for a few breakfasts.


Thank you for sharing Rachel, I tried it (except no.8 I'm not a big fan of honey), tasty and healthy! :)
ReplyDelete